


Introduce 3 convenient methods to run HTML in the Jupyter notebook
HTML can easily help use align the text in Jupyter notebook. In this post, it will introduce 3 very handy methods to run HTML in a Jupyter notebook.
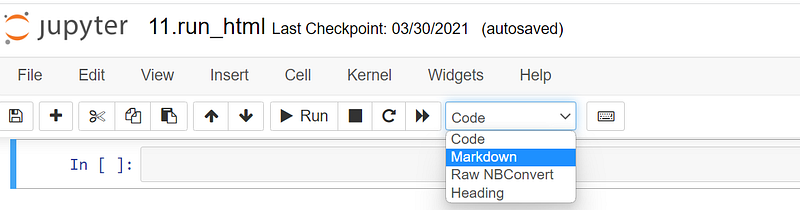
1. Run HTML in Markdown Cell
Create a new Jupyter notebook, or open one you have, and then choose “Markdown ” type for a cell.
(1) Example 1: create a head
For example, let’s create a head using h1 tags by typing the following code snippet in the markdown cell.
<h1>This is Header 1</h1>
The output is as follows:
This is Header 1
(2) Example 2: create a link
Next, let create a link to the official website of Jupyter project “https://jupyter.org/”.
<a href=”https://jupyter.org/">Jupyter Notebook</a>
The output looks like as follows:
(3) Example 3: embed an image
The next example is to embed an image, say the logo of Jupyter.
<img src= “./images/jupyter-logo.svg”>
The result goes as follows:

(4) Example 4: create a table
The last example is to create a table in Markdown cell of a Jupyter notebook. The table contains three rows and three columns.
<table>
    <tr>
        <th>Header 1</th>
        <th>Header 2</th>
        <th>Header 3</th>
    </tr>
    <tr>
        <td>row 1, cell 1</td>
        <td>row 1, cell 2</td>
        <td>row 1, cell 3</td>
    </tr>
        <tr>
        <td>row 2, cell 1</td>
        <td>row 2, cell 2</td>
        <td>row 2, cell 3</td>
    </tr>
    <tr>
       <td>row 3, cell 1</td>
       <td>row 3, cell 2</td>
       <td>row 3, cell 3</td>
    </tr>
</table>
The outcome looks as follows:

2. Run HTML with Magic Command
We still use the above examples, but Magic Command of Jupyter notebook will be used to run HTML in the code cell.
First create some code cells, and the default type of Jupyter notebook is code cell.
(1) Example 1: create a head
Type the following code snippet in the cell, where the first-line command %%HTML is HTML magic command.
%%HTML
<h1>This is header 1</h1>
This is header 1
(2) Example 2: create a link
%%html
<a href="https://jupyter.org/">Jupyter Notebook</a>
The output looks like as follows:
(3) Example 3: embed an image
%%html
<img  src= "./images/jupyter-logo.svg">
The different from HTML in Markdown cell is that default alignment of the image is left.
(4) Example 4: create a table
%%html
<table>
    <tr>
        <th>Header 1</th>
        <th>Header 2</th>
        <th>Header 3</th>
    </tr>
    <tr>
        <td>row 1, cell 1</td>
        <td>row 1, cell 2</td>
        <td>row 1, cell 3</td>
    </tr>

    <tr>
        <td>row 2, cell 1</td>
        <td>row 2, cell 2</td>
        <td>row 2, cell 3</td>
    </tr>
    <tr>
        <td>row 3, cell 1</td>
        <td>row 3, cell 2</td>
        <td>row 3, cell 3</td>
    </tr>
</table>
<tr>
<td>row 2, cell 1</td>
<td>row 2, cell 2</td>
<td>row 2, cell 3</td>
</tr>
<tr>
<td>row 3, cell 1</td>
<td>row 3, cell 2</td>
<td>row 3, cell 3</td>
</tr>
Similarly, the different from HTML in Markdown cell is that default alignment of the table is left.
3. IPython HTML module
Running HTML with IPython HTML module is also in the code cells of the Jupyter notebook.
(1) Example 1: create a head
from IPython.core.display import HTML
HTML('<h1>This is a header 1</h1>')This is header
(2) Example 2: create a link
from IPython.core.display import HTML
HTML('<a href="https://jupyter.org/">Jupyter Notebook</a>')(3) Example 3: embed an image
from IPython.core.display import HTML
HTML('<img src= "./images/jupyter-logo.svg">')(4) Example 4: create a table
The advantage of running HTML using IPython HTML module is that we can name the HTML code and then display the result in any other places where we need in a Jupyter notebook. For example, we give a variable name myhtable to store the table as follows:
from IPython.display import HTML
myhtable = """
<table>
<tr>
<th>Header 1</th>
<th>Header 2</th>
<th>Header 3</th>
</tr>
<tr>
<td>row 1, cell 1</td>
<td>row 1, cell 2</td>
<td>row 1, cell 3</td>
</tr>
<tr>
    <td>row 2, cell 1</td>
    <td>row 2, cell 2</td>
    <td>row 2, cell 3</td>
</tr>
<tr>
    <td>row 3, cell 1</td>
    <td>row 3, cell 2</td>
    <td>row 3, cell 3</td>
</tr>
</table>
"""Then we can display the table when we need just by passing the variable name myhtable of the table as the argument of the HTML function.
HTML(myhtable)Then we can get the table after running the function. You can use this method for image, video or any other HTML code.
4. Summary
This post displays three methods to run HTML inside a Jupyter notebook: (1) run directly with Markdown syntax, in which syntax is simple, and the code is hidden after running the code. (2) run HTML using %%html, in which the method is also easy and direct. (3) run HTML using IPython modules of HTML, in which we can define the code as a variable, and then display it in any cells of Jupyter notebook where we want.
5. Video Version
If you like a video version of this post, please go to my YouTube channel to watch it. If it is helpful, please subscribe my channel to show your support.
6. Course
If you are interested in learning Jupyter notebook in details, you are welcome to enroll one of my course Practical Jupyter Notebook from Beginner to Expert.