


Four Convenient methods to start Jupyter notebook will double the result with half the effort
Jupyter is a very popular web application for creating and sharing computational documents. It offers a simple, streamlined, document-centric experience.
This post will display you several different convenient methods to start the Jupyter notebook application or Jupyter Lab from a customized working directory with Windows Terminal and Anaconda PowerShell as an example. You can use CMD, PowerShell, or Windows Terminal if you have classical Python on Windows, or use Anaconda Prompt or Anaconda PowerShell if you have Anaconda Python distribution installed on Windows. You use your Terminal if you are a Linux or macOS user no matter you have classical Python or Anaconda Python distribution.
If you do not know what Windows Terminal is but are interested in it, you can read one of my previous posts, “Windows Python Developers Had Better Setup Earlier (I): Windows Terminal.”
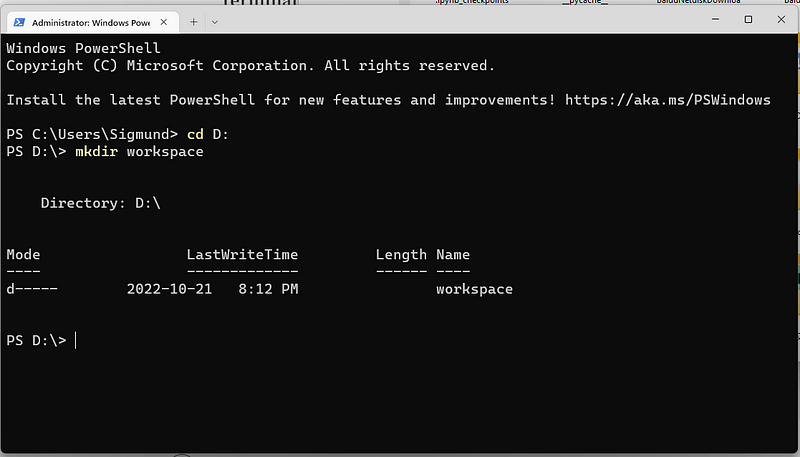
First, let’s use command line to create a folder named as “workspace” as our working directory in Disk D for an example. Open the Terminal (Windows, Linux, or Mac), or Anaconda PowerShell for Anaconda users on Windows, and type the following commands line by line.
cd D:
mkdir workspace
The first line is to change directory to D:, and the second line is to make a directory named workspace. The output shows that creation is successful.
Now, let’s access the newly created working directory and start Jupyter notebook there.
1. Type the Path of Working Directory
The traditional and also most widely used way is to type the path on the Terminal or the prompts, and then start Jupyter notebook.
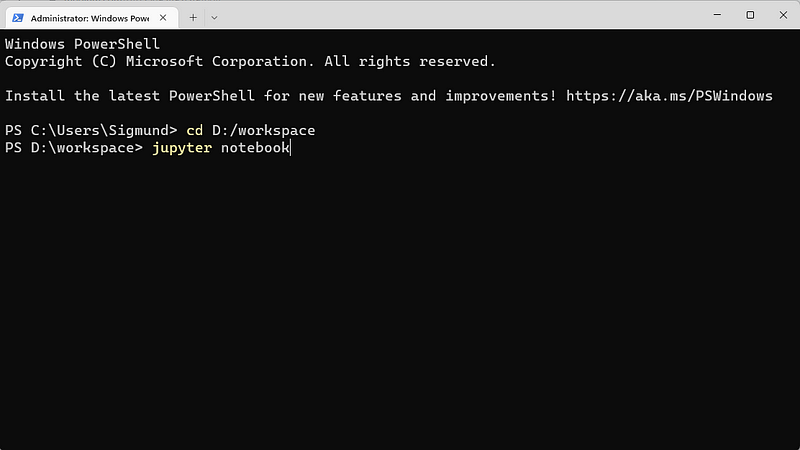
Whereas, this method seems not so handy if the path is very long.
2. Copy and Past the Path
You just type cd, and then copy and past path as illustrated in the following image.
Or you can just right-click to copy the folder, and then paste it in the command-line shell.
3. Hold and Drag the Directory
We can just click the folder, hold and drag it into the Terminal or Anaconda PowerShell, or other command line prompts. It seems that this method does not work on some Windows 11 systems.
4. Use Right-click Menu on Windows
Access the working directory, and then use the right-click menu and hint “open in terminal”. Next, type “Jupyter notebook” in the terminal to start the Jupyter notebook.

While for Anaconda users, you have to add Anaconda Prompt, or Anaconda PowerShell on the right-click menu, and I displayed how to do this in previous posts, Windows Python Developers Had Better Setup Earlier (III): Add Anaconda Prompt on the Right-click Menu and Windows Python Developers Had Better Setup Earlier(V): Add Anaconda PowerShell on Right-click Menu. You can choose one of them that you like. I suggest you add Anaconda PowerShell on right-click menu if you have no idea on which one to choose.

5. Video Version
If you like a video version of this post, please go to my YouTube channel to watch it. If it is helpful, please subscribe to my channel to show your support.
6. Course
If you are interested in learning Jupyter notebook in details, you are welcome to enroll one of my course Practical Jupyter Notebook from Beginner to Expert.