Windows Terminal: A Necessary Tool
I will use a few posts to talk about this topic “What Windows Python Developers Had Better Setup Earlier”. This post series includes the following topics:
- Part(I): Windows Terminal
- Part (II): Add Anaconda Prompt on the Windows Terminal
- Part(III): Add Anaconda Prompt on the Right-Click Menu
- Part(IV): Add Anaconda PowerShell Prompt on the Windows Terminal
- Part(V): Add Anaconda PowerShell Prompt on the Right-Click Menu
If you are interested in this series, please follow me. This is the first part of the story series, which talk about the Windows Terminal, including installation, Setup, as well 6 basic but regularly used features.
1. Terminals
There is a handy terminal on Linux and macOS. There are similar things, like ‘Command Prompt’ and ‘PowerShell’ on Windows, but it works not so conveniently as the Linux and macOS Terminals. However, the release of Windows Terminal has changed the situation. Windows Terminal is “a new, modern, fast, efficient, powerful, and productive terminal application for users of command-line tools and shells like Command Prompt, PowerShell, and WSL”.
Windows 11 has already preinstalled the ‘Windows Terminal’. Click start menu or the search icon beside the start menu, type ‘Windows Terminal’. Then right-click Windows Terminal and select ‘Pin to taskbar’. In this way, Windows Terminal is pined on taskbar. This is very handy for you to use when you need to start it in the future.
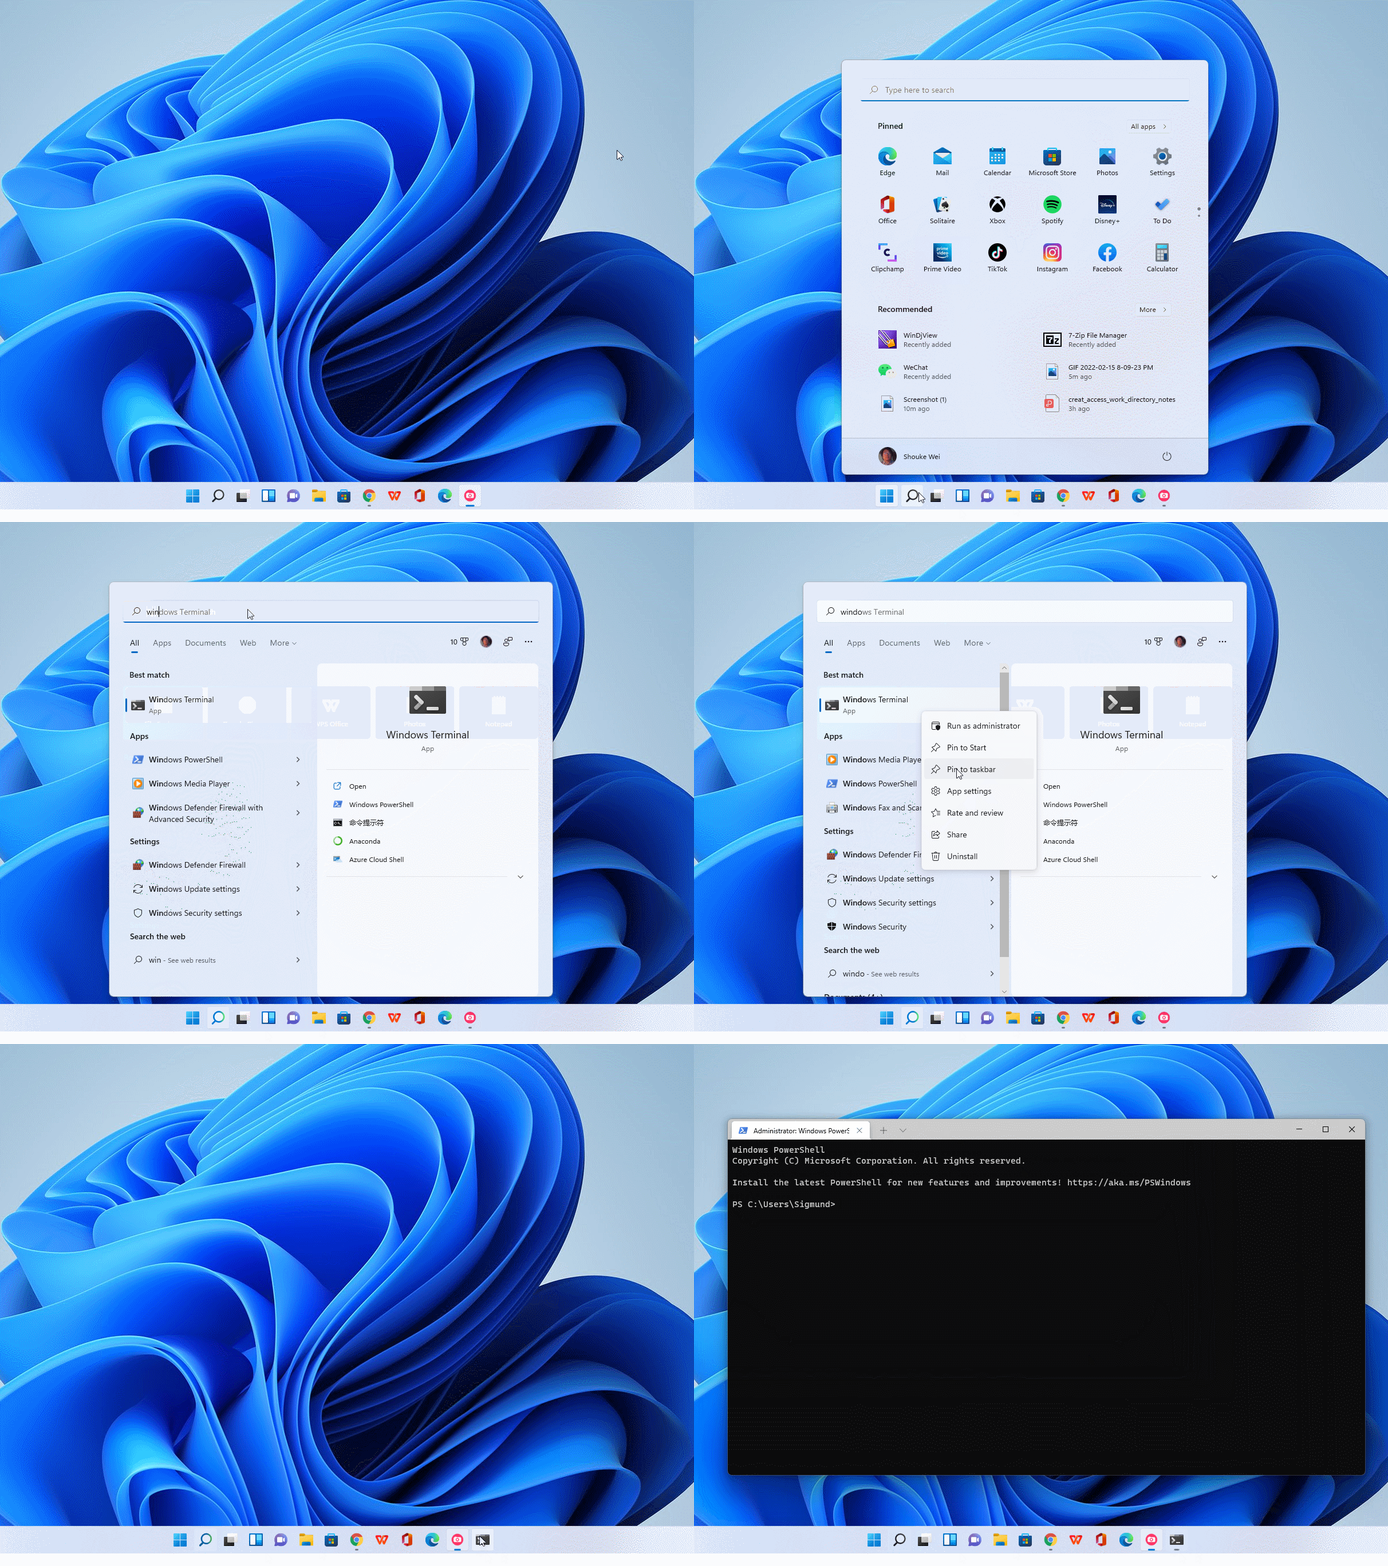
Whereas, we have to install it on Windows 10. Let’s see how to install it on Windows 10 since most people are still working with Windows 10.
2. Install Windows Terminal on Windows 10
It is very straightforward to install Windows Terminal from Microsoft store.
Step 1: Open Microsoft store from your computer, and it usually on the Taskbar. If it is not, just click the search icon beside the start menu and type “store” or “Microsoft store” to open it.
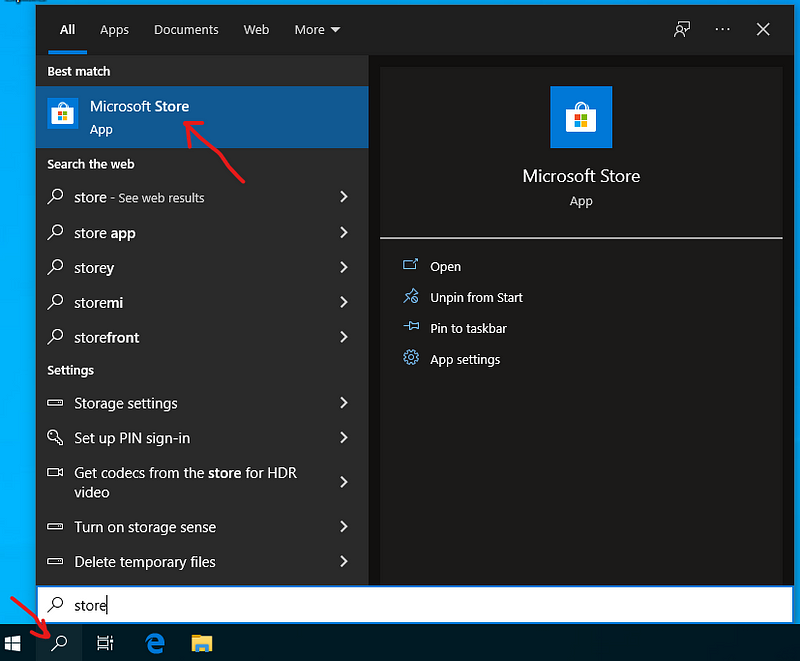
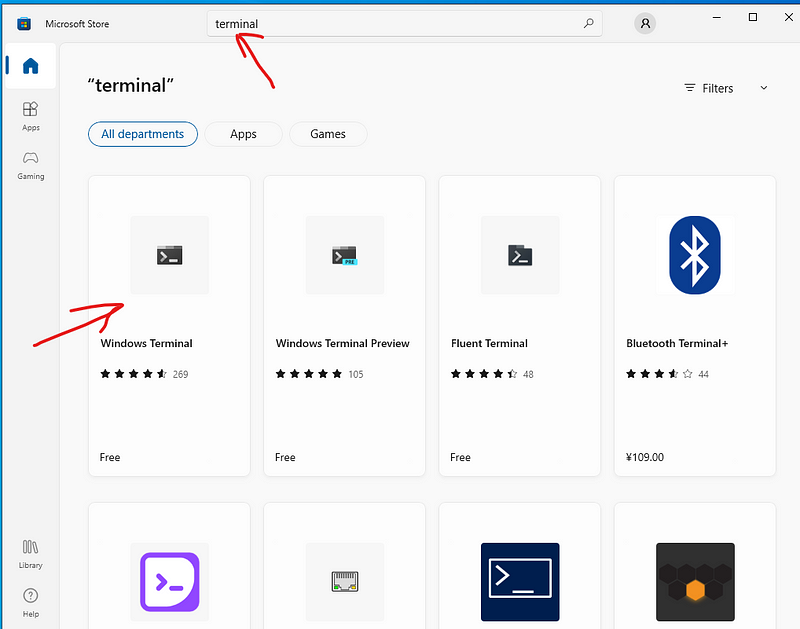
Step 2: Then type “Windows Terminal” or just “terminal” and search it.
Step 3: Click and open the Windows Terminal installation app
Step 4: Click “Get it” and the Windows Terminal will be downloaded and installed on your system.
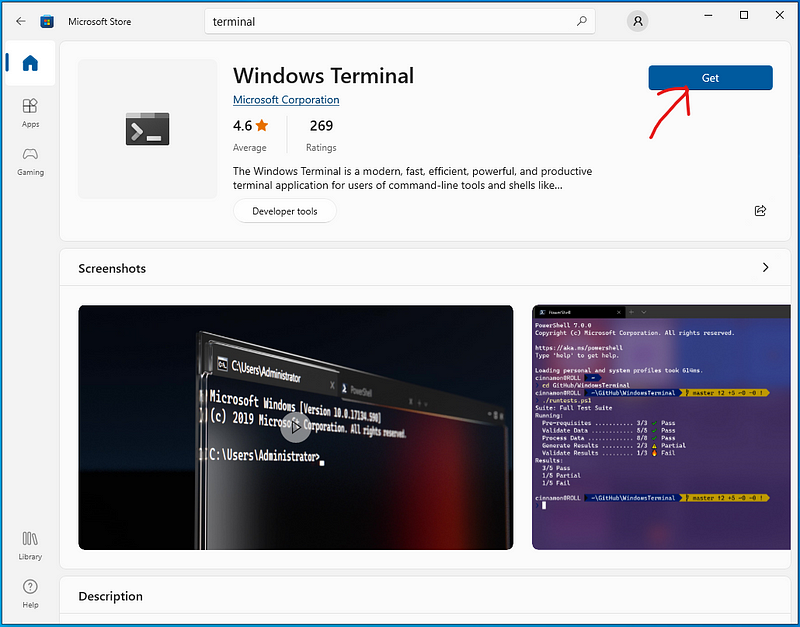
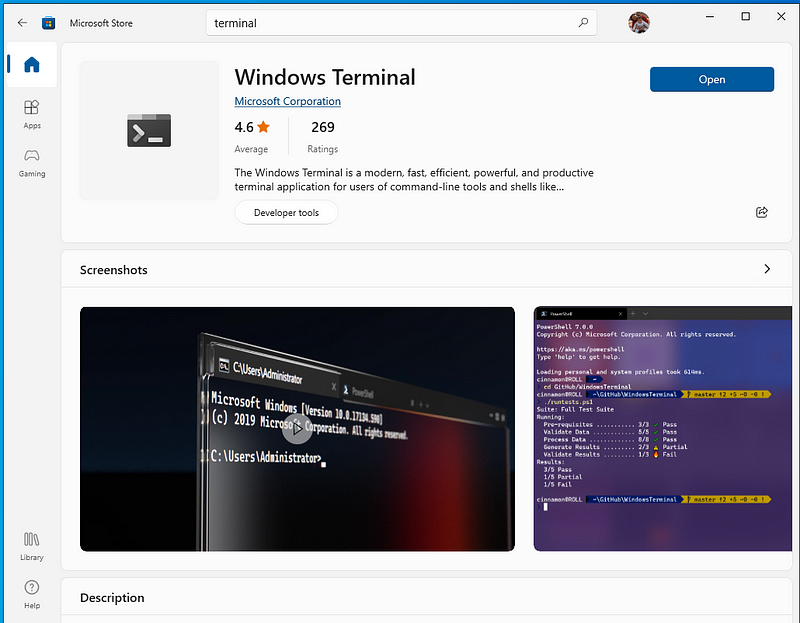
When you see the screenshot as follows, it means that the terminal was installed. Then just close it.
3. Set up the Windows Terminal
Step 5: Change the default profile of the terminal
Start up the terminal, click the drop-down button beside ‘+’ and choose the profile you want to use in a new tab.
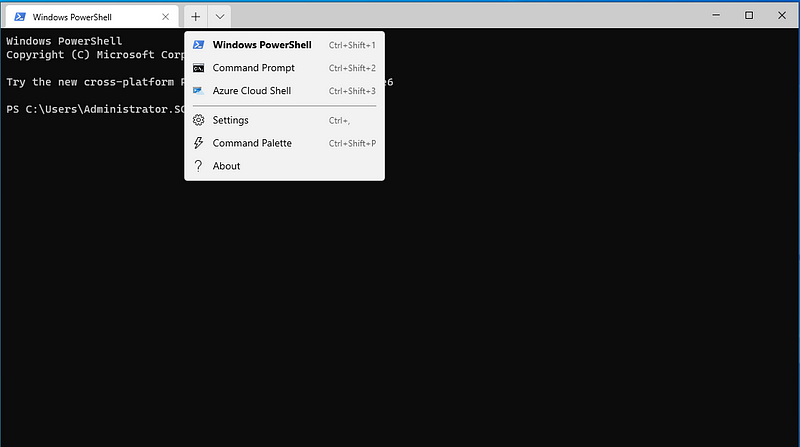
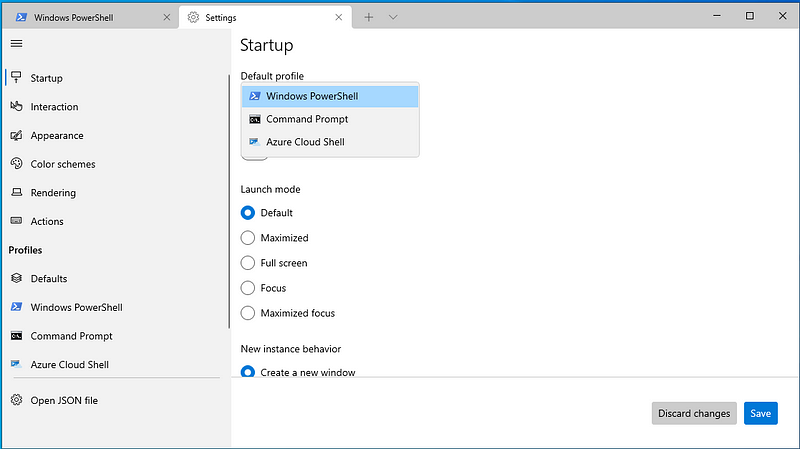
The default profile of the terminal is “Windows PowerShell”. If you like “Command Prompt”, you can change the default to it. Click the setting in the above screenshot (Fig. 6) to open the setting, and then select startup on the left panel, and choose “Command Prompt” on the right, followed by click “save”.
There are many other settings, like appearance. Here I would like to accept all the defaults.
Step 6: Pin it on the taskbar as we discussed for Windows 11 at the beginning.
If you like a video tutorial to watch the installation process in details, just click the following one and click to subscribe for more tips..
4. Main Handy Features for Python Developers
Windows Terminal has many awesome features, which are introduced on its online documentation. In this section, I will focus on 6 basic but regularly used features of the Windows Terminal.
(1) Check Python Version or Installed Package Version
If you were a very beginner, you were not sure how to install Python. Please go ahead to watch the following video and click to subscribe for more tips.
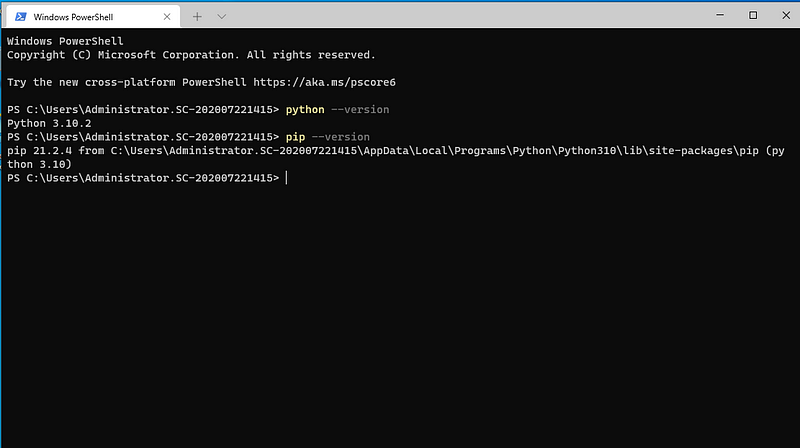
If you have already installed Python and Windows Terminal, open the terminal, type the following command to check the version of Python installed on your system.
python --version
To check the pip version installed on your system, type:
pip --version
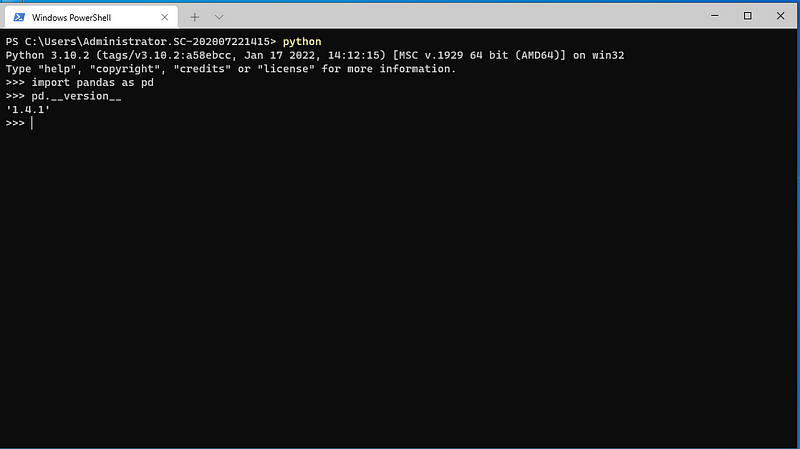
To check the version of an installed package, Pandas for example, it need start python first, followed by importing the package. Run the following code snippet line by line in the Terminal.
python
import pandas as pd
pd.__version__
(2) Install Python Packages
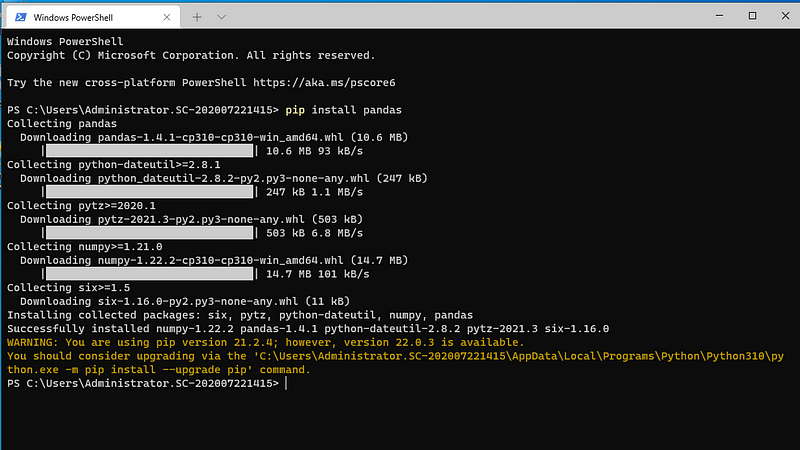
Another handy function of Windows Terminal is used to install Python packages. For example, let’s install “pandas”. We just type the following command in the terminal.
pip install pandas
(3) List the Installed Packages
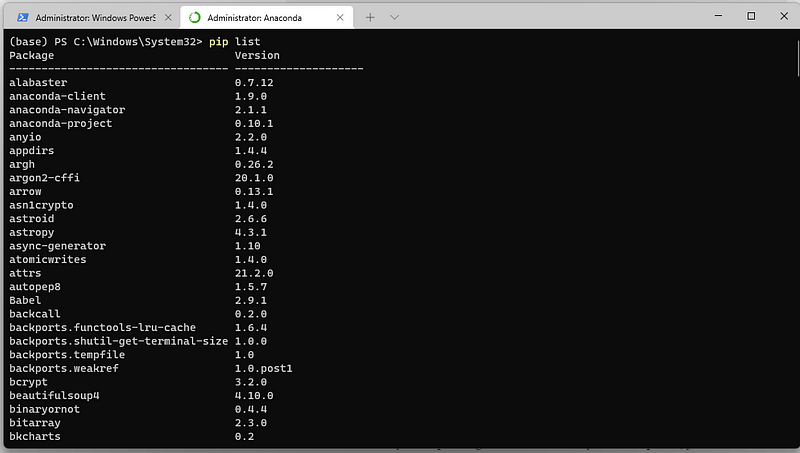
To check which Python package(s) installed in your computer, just run the following code in the terminal.
pip list
If you use Anaconda Python, you can use “conda list” as well.
(4) Run Python Code Interactively
To run Python code interactively, type the code line by line as follows, for example.
python
print('Hello, Windows Terminal.')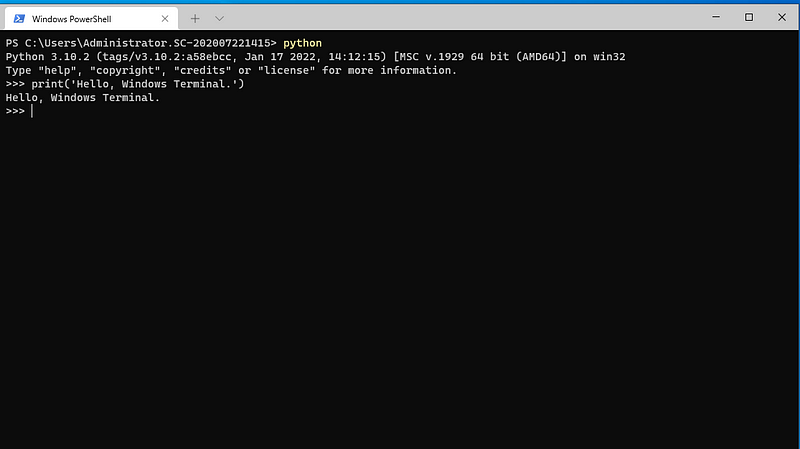
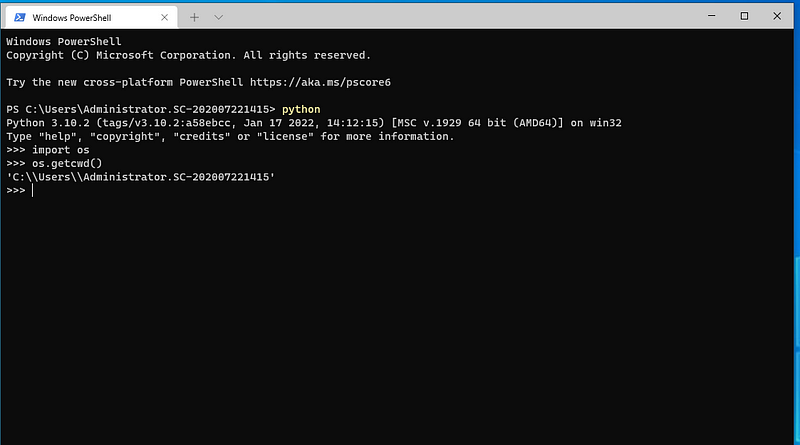
(5) Check current working directory
The first line is to start Python first, and the second line is to import os module. The third line is to check the current working directory (cwd)
python
import os
os.getcwd()
(6) Run Python file
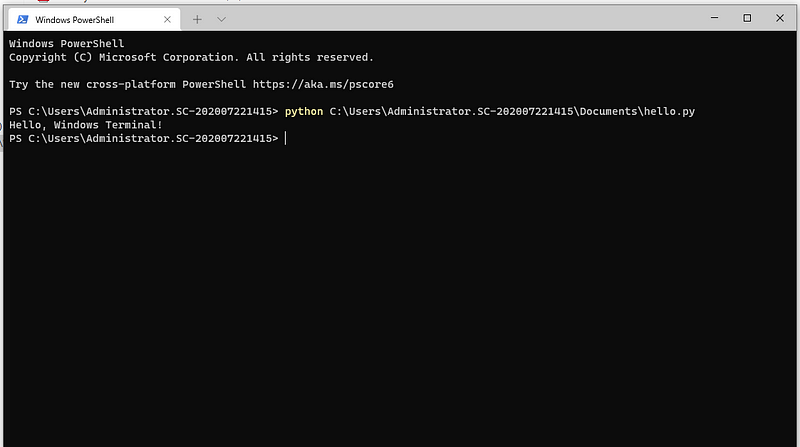
Let’s run a Python file called ‘hello.py’ in Document in Drive C in my computer for instance. Open the terminal and type:
python C:\Users\Administrator.SC-202007221415\Documents\hello.py
Summary:
This article illustrates how to install and setup the Windows Terminal. Besides, we also talk about 5 basic and regularly used features of the Windows Terminal, such as check Python version or the version of an installed package, install Python packages, check which package(s) installed, run Python code in interactive mode, check current working directory, and Run Python file. In addition, the Windows Terminal has many more other awesome functions. I would like to share them in the future articles.
More Information:
If you are interested in Python related courses on Python fundamental, Jupyter Notebook, Data Science, Wavelet Transforms, Machine Learning, and so on, welcome you to the online school — Deepsim Academy.


